
Saturday, June 27, 2009

Monday, June 15, 2009
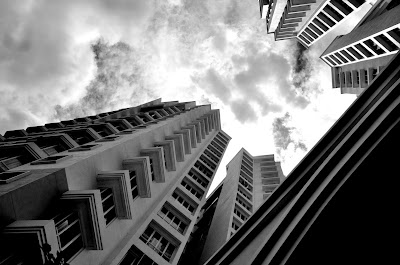
B&W N wash-out photo

1/2000 f5.6 ISO200
Nikon D5000
location : Regency Heights - Garden of Eve?
Original photo taken in colour but i decided to change it to B&W using photoshop - Channel Mixer.
location : Regency Heights
Another colour photo converted to Black & White using Photoshop Channel Mixer.
location : Regency Heights - Garden of Eve?
Original photo taken in colour but i decided to change it to B&W using photoshop - Channel Mixer.

1/800 f5.6 ISO200
Nikon D5000location : Regency Heights
Another colour photo converted to Black & White using Photoshop Channel Mixer.

1/800 f4.5 ISO200
Nikon D5000
location : Majestic Cinema
location : Majestic Cinema
![Reblog this post [with Zemanta]](https://lh3.googleusercontent.com/blogger_img_proxy/AEn0k_tWOnzcu0z28eqfKgUgkEl2Ip-NtEUeFM5DpgmqZ-ApHXvNyQ5rLeUvLZj-V8VvrBEXv94AWGJQQkBzSzn_AKFJxvoheAOF3NJO9OP0oivXt1_uVLngBSVeFxkdr4_29fXDahMcEKwJOHx2cJL9tLT6=s0-d)
Thursday, June 11, 2009
cross processing...anyone?
In the old days before digital photography (the dark(room) times, as I like to call them!) film was processed using chemicals. Different types of film needed different sets of chemicals. Slide film needed one set, a different set was needed for black and white, another for colour . . . and so on.
But what if you used the C41 chemicals to process, lets say, slide film? Well, the effect is that photographs have both a high contrast and a colour cast to them.
The colour cast could actually look quite artistic. Photographers made use of this to deliberately create an artistic look to their photographs.
The look has become more popular recently because it's found its way into magazine adverts. It has consequently become popular for wedding photography as couples look for more artistic wedding photography.
If you’ve never seen a cross processed image there’s a wedding photography example below, together with a Photoshop tutorial to show you how to achieve this cross processing effect.
Roll your mouse over the photograph below to see the before and after effect of cross processing.
NB: In the tutorial, words in bold dark green refer to menus and menu items in Photoshop.

Click on the diagonal line – marked by the arrows above - and pull the left hand end down a little, and the right hand end up a little. This creates an “S” shape curve.
Your photo should instantly have more contrast. You're on your way to creating the effect!
Photoshop cross processing tutorial - step two:
Create another curve adjustment layer, like you did in step 1 above (select Layer, then New Adjustment Layer then Curves…)
This time we are only going to be adjusting the “Red” part of the photograph. Have a look at the screenshot below:
There are three steps to take here. Taking one arrow at a time:
Create a third curve adjustment layer, like you did in steps 1 and 2 above (select Layer, then New Adjustment Layer then Curves…)
This time we are only going to be adjusting the “Blue” part of the photograph. Have a look at the screenshot below:
The steps to take here are similar to the “Red” adjustment above:
The last part is easy. If you press F7 on your keyboard, the Layer palette will appear. You will have four layers – your image, and then three curve adjustment layers.
If you think your image could do with a little more contrast, double click the bottom curves layer and adjust the “S” shape.
If you think it could be a little redder, click the middle layer and adjust the “S” shape curve.
Finally, if you think a little bluer would work well for your digital photo, select the top curve layer and adjust the inverse “S” shaped curve.
Once you are happy with your image, go to Layer, then select Flatten image.![Reblog this post [with Zemanta]](https://lh3.googleusercontent.com/blogger_img_proxy/AEn0k_sSVBxYTFUuhyhA9027T84RKZ0Z7drtAEflkJKwiWFb3Do-6Z1mGhj8lsDFk2tUP0GihPu1fcIwHDj5xonEA4UDRA2cZFsMihnTkYpi-jr3lvmIkk9EtvGY4QcDUgSuN8JvUhc9q3qAWr-cRJg6AQyJ=s0-d)
- NB:If you have an old colour film lying around, have a look at the label on the side. It probably says “C41 process”. This tells the film processor which chemical set to use (C41 was the most common set for colour film).
But what if you used the C41 chemicals to process, lets say, slide film? Well, the effect is that photographs have both a high contrast and a colour cast to them.
The colour cast could actually look quite artistic. Photographers made use of this to deliberately create an artistic look to their photographs.
The look has become more popular recently because it's found its way into magazine adverts. It has consequently become popular for wedding photography as couples look for more artistic wedding photography.
If you’ve never seen a cross processed image there’s a wedding photography example below, together with a Photoshop tutorial to show you how to achieve this cross processing effect.
Roll your mouse over the photograph below to see the before and after effect of cross processing.
NB: In the tutorial, words in bold dark green refer to menus and menu items in Photoshop.
Making the effect using Photoshop - tutorial
Photoshop cross processing tutorial - step one:
Have a browse through your photos. Choose something that will suit the cross processing style – photos of people are always a good choice.
Open your image in Photoshop. We’re going to create the effect using curves. To do this, select Layer, then New Adjustment Layer and finally Curves…
A new dialog box will pop up, and here you can enter a name if you like. If not, just click on OK.
Once you have done this, the curves dialog box will appear. It should look something like the screenshot below:

Click on the diagonal line – marked by the arrows above - and pull the left hand end down a little, and the right hand end up a little. This creates an “S” shape curve.
Your photo should instantly have more contrast. You're on your way to creating the effect!
Add some colour cast
Now you have the contrast, we need to add a colour cast.Photoshop cross processing tutorial - step two:
Create another curve adjustment layer, like you did in step 1 above (select Layer, then New Adjustment Layer then Curves…)
This time we are only going to be adjusting the “Red” part of the photograph. Have a look at the screenshot below:

There are three steps to take here. Taking one arrow at a time:
- Click on the down arrow of the drop down box (arrow 1). A menu pops down.
- Select “Red” from this new menu (arrow 2).
- Finally, create another shallow “S” shape to the curve, like you did for Photoshop cross processing tutorial - step 1 above (arrow 3).
More colour cast
Photoshop cross processing tutorial - step three:Create a third curve adjustment layer, like you did in steps 1 and 2 above (select Layer, then New Adjustment Layer then Curves…)
This time we are only going to be adjusting the “Blue” part of the photograph. Have a look at the screenshot below:

The steps to take here are similar to the “Red” adjustment above:
- Click on the down arrow of the drop down box, but this time select “Blue”(arrow 1).
- Then, create another shallow, but this time an inverse “S” shape to the curve (arrow 2).
Finishing up
Photoshop cross processing tutorial - step four:The last part is easy. If you press F7 on your keyboard, the Layer palette will appear. You will have four layers – your image, and then three curve adjustment layers.
If you think your image could do with a little more contrast, double click the bottom curves layer and adjust the “S” shape.
If you think it could be a little redder, click the middle layer and adjust the “S” shape curve.
Finally, if you think a little bluer would work well for your digital photo, select the top curve layer and adjust the inverse “S” shaped curve.
Once you are happy with your image, go to Layer, then select Flatten image.
Saturday, June 6, 2009


Nikon D5000


My new camera, which is a surprise from my darling.
D5000 with kit lens 18-55mm (3.5f-5.5f) VR
This model is not yet available in Malaysia the time i got the present. It was purchased from Singapore by a friend.
D5000 with kit lens 18-55mm (3.5f-5.5f) VR
This model is not yet available in Malaysia the time i got the present. It was purchased from Singapore by a friend.
Wednesday, May 13, 2009
Nikon TTL Flashes
Guide to Nikon TTL Flashes
by Shun Cheung
Photography is about creating images with light. For indoor, night, fill light, or certain special effects, using electronic flashes to generate light becomes an important component in modern photography. Nikon’s current flash technology is called i-TTL, and they offer five different external flash options. So far all of those i-TTL flashes have three-digit model numbers in the form of SB-n00 (e.g. SB-600, SB-900 and there is also an SB-R200) while the older, non-i-TTL flashes have two-digit model numbers (e.g. SB-28 and SB-80 DX). Therefore, it is very easy to determine which ones are i-TTL compatible. This article provides a brief history of the evolution of Nikon TTL flash technology and a guide to those five i-TTL flashes.
The intro image demonstrates the size differences amongst the SB-900, SB-800 and SB-600.
The Introduction of Digital and D-TTL
Nikon introduced the TTL (through-the-lens) flash technology to its film SLRs (Single-Lens Reflex Cameras) in the mid 1980’s. The major advantage of TTL flash is that flash exposure is measured during the actual exposure, as the amount of light reflected off the film is detected by sensors placed inside the mirror box. When a sufficient amount of light is detected, the flash is electronically shut off instantaneously.
In 1999, Nikon released its first digital SLR, the D1. The new problem then was that the digital sensor and the anti-aliasing filter in front of it did not reflect light the same way traditional film does. As a result, Nikon had to modify its TTL flash technology as it was no longer possible to measure the amount of reflected light during the actual exposure. Instead, Nikon used pre-flashes and measured their strength to determine how much flash power was needed.
The initial technology was called D-TTL. It is merely a slight modification from film TTL. Instead of measuring the light reflected off the film during actual exposure, D-TTL carries out a quick series of pre-flashes after the mirror has flipped up but before the shutter opens. On D-TTL DSLR bodies, the outward-facing side of the shutter blades is painted light gray to reflect more light so that it would be easier to measure the pre-flash. Flash metering is still carried out by sensors placed inside the mirror box as before.
Correspondingly, Nikon also made a slight modification to its last film flash, the SB-28, into the SB-28 DX. All three D-TTL flashes Nikon would eventually introduce all have the “DX” suffix. (Subsequently, there were also the SB-50 DX and SB-80 DX.)
The D-TTL era lasted four years and Nikon only introduced four DSLRs that use D-TTL exclusively: the D1 family: the D1, D1H and D1X and the subsequent D100 in 2002. However, the entire D2 family is also backwards compatible with D-TTL; in fact, they are the only cameras that are both D-TTL and i-TTL compatible.
i-TTL and the Creative Lighting System (CLS)
In July 2003, Nikon announced the D2H, the first of what would be four cameras from the D2 family, along with a new SB-800 flash. They were the first installment to Nikon’s iTTL and Creative Lighting System (CLS). The new triple-digit model number without the DX suffix indicated the new flash technology. The pre-flash is still required for digital, but it takes place slightly earlier in the exposure cycle, before the mirror flips up. Therefore, pre-flash exposure is measured inside the viewfinder instead of inside the mirror box.
In addition to TTL flash, CLS is a complex system of master and remote wireless flashes. There can be up to a total of three groups (A, B and C) of wireless remote flashes that can be controlled independently with different exposure compensations. There are also four separate channels (1 to 4) so that multiple photographers will not interfere with one another in the same room.
Nikon Flash Terminologies
- TTL: Through-the-Lens flash metering
- TTL-BL: Balanced fill flash between flash and ambient light
- TTL-FP: Focal Plane flash: permits flash photography with a shutter speed faster than the camera sync speed, which is typically 1/250 sec or 1/200 sec on Nikon DSLRs. In the * TTL-FP mode: the flash uses a sequence of pulse flashes to get round the sync speed limitation so that it can sync with as fast as 1/8000 sec but at reduced flash power. The higher the shutter speed, the greater the flash power reduction.
- A: Auto, instead of using TTL flash with a flash meter inside the camera to measure the amount of flash, use a flash metering sensor built inside the flash to control the flash level. Among iTTL flashes, this feature is only available on the SB-800 and SB-900
- M: manual, control the flash level manually at full, 1/2, 1/4, 1/8…typically at 1/3-stop increments.
Nikon Flash Specifications
| SB-900 | SB-800 | SB-600 | SB-400 | |
| Guide Number at ISO 200 | 157.5 (feet) | 174 | 138 | 98 |
| Weight (w/out batteries) | 15.1oz, 427g | 12.4oz, 350g | 10.8oz, 306g | 4.5oz, 128g |
| Battery Type | 4 AA | 4 AA, 5 AA | 4 AA | 2 AA |
| Recycle Time with NiMH AA Batteries | 2.3 sec | 4 sec, 2.9 sec with 5 AA | 2.5 sec | 2.5 sec |
| High-voltage Input | yes | yes | — | — |
| Swivel Head for Bounce Flash | yes | yes | yes | horizontal only |
| CLS Master | yes | yes | — | — |
| CLS Slave | yes | yes | yes | — |
| Zoom Head | 24-200mm FX/DX adjustment | 24-105mm FX coverage | 24-85mm FX coverage | fixed at 27mm FX (18mm DX) |
| Flip-out Diffuser Coverage | 17mm FX 11mmDX | 17mm | 14mm | — |
| Add-on Diffuser Dome Coverage | 17mm FX 11mm DX | 14mm | not supplied | not supplied |
| D-TTL | — | yes | yes | — |
| Film TTL | — | yes | yes | — |
| A Mode (non-TTL auto flash) | yes | yes | — | — |

Nikon SB-800 Flash with SD-8A Power Pack
Conclusion
For those who own current Nikon DSLRs (as well as the F6 film SLR), i-TTL and CLS is simply a wonderful flash system that can be as simple as just the built-in pop-up flash, one external flash, or it could be a complex, multi-flash system that works in a coordinated manner.
If you are a more casual digital photographer taking the typical family and travel images and would like something a bit stronger than the camera’s built-in flash, the SB-400 would be a good, affordable choice without any advanced features.
For the more intermediate to advanced photographers, the SB-600 is still quite affordable but is packed with useful features such as horizontal and vertical bounce flash as well as serving as a wireless remote.
For serious amateurs to professional photographers, especially those who are into wedding, wildlife, news, and certain types of sports photography, the SB-800 and SB-900 should be the best tools because of their power and fast recycle times. Additionally, for a lot of indoor, controlled settings, multiple Nikon CLS flashes can work together to produce beautiful results. At this point the SB-900 is certainly state of the art, but some may find its large size to be somewhat inconvenient.
Additonal Learning
Shortly after I had written this article, I bought a copy of Nikon School’s new DVD: A Hands-on Guide to Creative Lighting, featuring professional photographers Bob Krist and Joe McNally. I watched the entire DVD immediately and then repeated some selected sections. The DVD is a bit pricy but provides an excellent presentation on the entire Creative Lighting System. The DVD has two main sections. First Bob Krist reviews the basics about the quality of light and then builds a three-flash set up for a typical portrait session, one flash at a time. He also describes how to operate the SB-900, 800, 600, and R200.
The second part of the DVD features Joe McNally with Bob Krist assisting him at three locations: (1) the Boston Ballet photographing several dancers in both action and group portrait settings, (2) a bridal portrait session at a country inn, and (3) a fisherman portrait set up in a New England harbor where McNally eventually uses a total of a dozen i-TTL flashes working in coordination. They demonstrated many different CLS setups under many different real-life settings.
If you would like to learn more about lighting with Nikon i-TTL flashes and how the system works together in actual settings, this DVD is a really good way to go.
Monday, May 11, 2009


Saturday, March 29, 2008
Two-colour technicolor
This week, I had a chance to try another technique which I can apply to my pictures. The results, it gave the picture a different 'feeling' when compares to the original one.

after treatment using Photoshop. The technique is called "Two-colour technicolor"

original photo.

after treatment using Photoshop. The technique is called "Two-colour technicolor"

original photo.
Monday, March 10, 2008
pics from my old CD (Melaka & Sabah)

Although it is now known as St. Paul's Church, it was not always so. Its original name was "Our Lady of the Hill". However when the Dutch took over Malacca and turned the church premise into a burial ground, it was renamed. There are still various tombs of Dutch noblemen found at the grounds for that historical sentimentalism.
One tomb was particularly heart wrenching. Written on the tombstone were the names and dates of family members who had past away within days from each other. Their names and ages were etched on the tombstone. Some were as young as a few months to a few years old only. The tombstone was set up by their grandfather in their memory. While this was a sad tombstone to look at, there were others that are rather interesting. Bearing skull and crossbones motifs, it will send a shiver down anyone's spine

View from the top of Mt Kinabalu, Sabah.

above the clouds. Sunrise on Lowe's peak

Donkey Peak to the left of the picture
Thursday, February 28, 2008
Xiang Xiang (Ai Wei's daughter)
I had a chance to catch up with my best friend from JB. Her daughter has grown a lot 'bigger' since I last saw them.


Tuesday, January 22, 2008
Lomography

Lomography- this effects can be achived using a LOMO camera or digital effect as stated below.
from WIKIPEDIA ~
Some photographers feel that the Lomo LC-A lens effect can be digitally emulated with photo-editing software such as GIMP or Photoshop. In addition, the company's promotional web site for Lomography showcases many high-contrast photographs - with unusual saturation and color - that were created using the technique called cross processing in which film intended for developing in slide chemistry (E-6) is processed in photographic negative chemistry (C-41), and vice versa. This technique can be employed with any film camera and can be somewhat mimicked with digital software as well.
Sunday, January 20, 2008


Thursday, December 27, 2007
a place called home
 was sitting on my sofa and suddenly my focus shift to the curtain i recently fitted on. The patterns on the curtain reflects the lights from the sun about to set behind the mountain.
Wednesday, December 26, 2007
Wedding Photography - 21 Tips for for Amateur Wedding Photographers
from dPS (

"Help me - O'm photographing my first Wedding!"It’s a question that’s been asked a few times in our forums over the last few months so while I’m not a Pro Wedding Photographer I thought it was time to share a few tips.
I’ll leave the technical tips of photographing a wedding to the pros - but as someone who has been asked to photograph numerous friends and family weddings - here are a few suggestions.
1. Create a ‘Shot List’
Get the couple to think ahead about the shots that they’d like you to capture on the day and compile a list so that you can check them off. This is particularly helpful in the family shots. There’s nothing worse than getting the photos back and realizing you didn’t photograph the happy couple with grandma!
2. Family Photo Coordinator
I find the family photo part of the day can be quite stressful. People are going everywhere, you’re unaware of the different family dynamics at play and people are in a ‘festive spirit’ (and have often been drinking a few spirits) to the point where it can be quite chaotic. Get the couple to nominate a family member (or one for each side of the family) who can be the ‘director’ of the shoot. They can round everyone up, help get them in the shot and keep things moving so that the couple can get back to the party.
3. Scout the Location
Visit the locations of the different places that you’ll be shooting before the big day. While I’m sure most Pros don’t do this - I find it really helpful to know where we’re going, have an idea of a few positions for shots and to know how the light might come into play. On one or two weddings I even visited locations with the couples and took a few test shots (these made nice ‘engagement photos’).
4. Preparation is key
So much can go wrong on the day - so you need to be well prepared. Have a backup plan (in case of bad weather), have batteries charged, memory cards blank, think about routes and time to get to places and get an itinerary of the full day so you know what’s happening next. If you can, attend the rehearsal of the ceremony where you’ll gather a lot of great information about possible positions to shoot from, the lighting, the order of the ceremony etc
5. Set expectations with the Couple
Show them your work/style. Find out what they are wanting to achieve, how many shots they want, what key things they want to be recorded, how the shots will be used (print etc). If you’re charging them for the event, make sure you have the agreement of price in place up front.
6. Turn off the sound on your camera
Beeps during speeches, the kiss and vows don’t add to the event. Switch off sound before hand and keep it off.
7. Shoot the small details
Photograph rings, backs of dresses, shoes, flowers, table settings, menus etc - these help give the end album an extra dimension. Flick through a wedding magazine in a news stand for a little inspiration.
8. Use Two Cameras
Beg, borrow, hire or steal an extra camera for the day - set it up with a different lens. I try to shoot with one wide angle lens (great for candid shots and in tight spaces (particularly before the ceremony in the preparation stage of the day) and one longer lens (it can be handy to have something as large as 200mm if you can get your hands on one - I use a 70-200mm).
9. Consider a Second Photographer
Having a second backup photographer can be a great strategy. It means less moving around during ceremony and speeches, allows for one to capture the formal shots and the other to get candid shots. It also takes a little pressure off you being ‘the one’ to have to get every shot!
10. Be Bold but Not Obtrusive
Timidity won’t get you ‘the shot’ - sometimes you need to be bold to capture a moment. However timing is everything and thinking ahead to get in the right position for key moments are important so as not to disrupt the event. In a ceremony I try to move around at least 4-5 times but try to time this to coincide with songs, sermons or longer readings. During the formal shots be bold, know what you want and ask for it from the couple and their party. You’re driving the show at this point of the day and need to keep things moving.
11. Learn how to Use Diffused Light
The ability to bounce a flash or to diffuse it is key. You’ll find that in many churches that light is very low. If you’re allowed to use a flash (and some churches don’t allow it) think about whether bouncing the flash will work (remember if you bounce off a colored surface it will add a colored cast to the picture) or whether you might want to buy a flash diffuser to soften the light. If you can’t use a flash you’ll need to either use a fast lens at wide apertures and/or bump up the ISO. A lens with image stabilization might also help. Learn more about Using Flash Diffusers and Reflectors.
12. Shoot in RAW
I know that many readers feel that they don’t have the time for shooting in RAW (due to extra processing) but a wedding is one time that it can be particularly useful as it gives so much more flexibility to manipulate shots after taking them. Weddings can present photographers with tricky lighting which result in the need to manipulate exposure and white balance after the fact - RAW will help with this considerably.
13. Display Your Shots at the Reception
One of the great things about digital photography is the immediacy of it as a medium. One of the fun things I’ve seen more and more photographers doing recently is taking a computer to the reception, uploading shots taken earlier in the day and letting them rotate as a slideshow during the evening. This adds a fun element to the night.
14. Consider Your Backgrounds
One of the challenges of weddings is that there are often people going everywhere - including the backgrounds of your shots. Particularly with the formal shots scope out the area where they’ll be taken ahead of time looking for good backgrounds. Ideally you’ll be wanting uncluttered areas and shaded spots out of direct sunlight where there’s unlikely to be a wandering great aunt wander into the back of the shot. Read more on getting backgrounds right.
15. Don’t Discard Your ‘Mistakes’
The temptation with digital is to check images as you go and to delete those that don’t work immediately. The problem with this is that you might just be getting rid of some of the more interesting and useable images. Keep in mind that images can be cropped or manipulated later to give you some more arty/abstract looking shots that can add real interest to the end album.
16. Change Your Perspective
Get a little creative with your shots. While the majority of the images in the end album will probably be fairly ‘normal’ or formal poses - make sure you mix things up a little by taking shots from down low, up high, at wide angles etc.
17. Group Shots
One thing that I’ve done at every wedding that I’ve photographed is attempt to photograph everyone who is in attendance in the one shot. The way I’ve done this is to arrange for a place that I can get up high above everyone straight after the ceremony. This might mean getting tall ladder, using a balcony or even climbing on a roof. The beauty of getting up high is that you get everyone’s face in it and can fit a lot of people in the one shot. The key is to be able to get everyone to the place you want them to stand quickly and to be ready to get the shot without having everyone stand around for too long. I found the best way to get everyone to the spot is to get the bride and groom there and to have a couple of helpers to herd everyone in that direction. Read more on how to take Group Photos.
18. Fill Flash
When shooting outside after a ceremony or during the posed shots you’ll probably want to keep your flash attached to give a little fill in flash. I tend to dial it back a little (a stop or two) so that shots are not blown out - but particularly in backlit or midday shooting conditions where there can be a lot of shadow, fill in flash is a must. Read more about using Fill Flash.
19. Continuous Shooting Mode
Having the ability to shoot a lot of images fast is very handy on a wedding day so switch your camera to continuous shooting mode and use it. Sometimes it’s the shot you take a second after the formal or posed shot when everyone is relaxing that really captures the moment!
20. Expect the Unexpected
One more piece of advice that someone gave me on my own wedding day. ‘Things will Go Wrong - But They Can be the Best Parts of the Day’. In every wedding that I’ve participated in something tends to go wrong with the day. The best man can’t find the ring, the rain pours down just as the ceremony ends, the groom forgets to do up his fly, the flower girl decides to sit down in the middle of the aisle or the bride can’t remember her vows….
These moments can feel a little panicky at the time - but it’s these moments that can actually make a day and give the bride and groom memories. Attempt to capture them and you could end up with some fun images that sum up the day really well.
I still remember the first wedding I photographed where the bride and grooms car crashed into a Tram on the way to the park where we were going to take photos. The bride was in tears, the groom stressed out - but after we’d all calmed down people began to see some of the funny side of the moment and we even took a couple of shots before driving on to the park. They were among everyone’s favorites.
21. Have Fun
Weddings are about celebrating - they should be fun. The more fun you have as the photographer the more relaxed those you are photographing will be. Perhaps the best way to loosen people up is to smile as the photographer (warning: I always come home from photographing weddings with sore jaws and cheeks because of of my smiling strategy).
Wednesday, December 12, 2007
Wedding Photojournalism Myths
Wedding Photojournalism Myths
article from Wedding Photojournalism AssociationWith the number of wedding photojournalists perpetually on the rise, confusion over what they will and won’t do seems to be increasing at a parallel rate. The article aims to bust the most common wedding photojournalism misconceptions and stereotypes circulating in the marketplace.
MYTH: WEDDING PHOTOJOURNALISTS CAN'T CREATE GOOD PORTRAITS
Perhaps in an effort to protect their business, traditional wedding photographers often try to scare brides and grooms into thinking that they will not be able to have wedding portraits taken if they decide to use a wedding photojournalist.
In fact, many wedding photojournalists take portraits or posed shots if that’s what their client wants.
As WPJA member Shane Snider points out, there’s more than just one way to shoot portraits. “Just because wedding photojournalists capture moments, doesn’t mean we can’t use our creativity to capture a good portrait as well, he says. “If you look at a wedding photojournalist’s portraits, they can be artistic and natural looking. They’re still portraits; it’s just a different style. Photojournalists try to take portraits that fit the way they take the rest of the pictures.”
Snider says his clients have embraced his unconventional approach to portraits. “They want something a little different than the in-the-park pictures,” he says. “Obviously they’re going to want formal photos. But we try to be a little more creative.” Snider’s strategies range from layering the subjects for photo depth to creatively selecting a backdrop (looking for compositionally interesting elements in the environment). “It’s just a little different than getting everyone together and telling them to say cheese,” he says.

As a wedding photojournalist who shoots a lot of outdoor weddings around Jackson Hole, WY, WPJA contest winner Jonathan Adams tries to incorporate the surroundings into his photographs as much as possible. “The outdoors is such an important reason people choose to get married here, so I work really hard to make the portraits unlike any of the photographs that the guests are shooting.”
So where does the portrait misconception come from anyway? Adams thinks that when wedding photojournalism is compared to traditional wedding photography, an easy way for people to describe the style is “un-posed”—a major oversimplification. “People take that description literally that we don’t do posed pictures, when in reality, portraits have historically always been a skill of a good photojournalist,” he says, adding that the overall difference, even beyond style, is that “wedding photojournalists are trying to tell a story.” And even portraits can be a part of that.
Although posed shots do seem to contradict the very notion of photojournalism—and are definitely not why you hire a wedding photojournalist in the first place—almost all are willing to take posed photos during a planned formals session, and will accommodate specific requests when asked.
Adams tries to keep his posing to a minimum, and notes that, “My favorite portraits tend to be the moments between the shots. You shoot a photo and the second after you lower your camera, they feel comfortable and let down their guard. And you start to see them as they are, not as they think they should be.”
He tries to create a laid-back, social environment in which people are comfortable and those natural moments are more likely to unfold in front of the camera. “A group hug seems so much more real to me then all the bridesmaids holding their bouquets properly,” he says. If everyone is standing stiff for a photo, he’ll ask them to come together real tight. “The word "hug" really helps them drop their defenses, and they start to smile because of joy and friendship, not because they are posing for a photo.”
MYTH: WEDDING PHOTOJOURNALISTS WON’T USE FLASH
Snider actually laughs out loud when he considers this myth, because it’s that absurd. “It is completely untrue. Some of the best wedding photojournalists out there use flash and they’re very good at it. Some people might think it’s more natural to use available light, but sometimes flash is the only light that’s available.”

As one who takes every possible measure not to interrupt a real moment, Snider uses his flash sparingly and in a calculated manner. “Using flash correctly—in a way that makes it look more natural—is a skill that takes a lot of work,” he says. “You need to make sure the flash doesn’t interfere with the moment.”
“It gets tricky to use flash and to keep the moments real,” he explains. “As soon as people see a flash, they look at the camera.” Avoiding the intrusive flash-in-the-face approach, he applies more inconspicuous lighting techniques such as using bounce flash.
Another technique wedding photojournalists employ is to tone down the intensity of their flash by controlling it through the settings. This can be very effective in preventing the subjects from being too camera-aware, and it also helps produce pictures with more natural-looking light. When this technique is properly executed, most people will not be able to discern the use of flash in the pictures, and perhaps that's where the no-flash myth originated!
MYTH: WEDDING PHOTOJOURNALISTS TAKE GRAINY AND BLURRY PHOTOS
This is often related to the flash myth, since shooting pictures in low light can lead to unappealing grainy and blurred-looking images, especially if the photographer is not particularly skilled at working in such settings. There’s also a misconception among many people that wedding photojournalism is defined by ambient-light only imagery, and that all of its practitioners exemplify that style.
Some highly accomplished wedding photojournalists do go for the occasional blurred image to capture the movement or atmosphere of a scene as it unfolds. They basically take the picture using a slower shutter speed that does not freeze everything in the photograph. However, the vast majority of photojournalistic wedding pictures are clean and sharp, as illustrated by a browse through the WPJA’s contest galleries, or those of individual members. In a nutshell, blurry and/or grainy images are most likely the product of deliberate artistic shooting, especially as it pertains to WPJA members, not technical shortcomings as some would contend.
MYTH: YOUR PHOTOS ARE GOING TO LOOK CLUTTERED BECAUSE WEDDING PHOTOJOURNALISTS NEVER ALTER SCENES
Many wedding photojournalists take weddings just as seriously as they do any news event—making even the slightest of changes in the surroundings, regardless of how insignificant they might seem to you, a breach of ethics.
It’s important to recognize that wedding photojournalists are skilled at altering the background without actually moving anything. Without bulky equipment to lug around, they’re able to move quickly around the room, capturing scenes from various angles, making background decisions based on what they see in their viewfinders. Something as simple as a photographer's step in a certain direction or a change in elevation can do wonders in cleaning up a distracting foreground/background.
Because wedding photojournalists don’t create fake, unrealistic backgrounds, they’re constantly looking for the most pleasing backdrop for their photos. It’s a different way of controlling the scene. “I think that has been one of the hardest things for many photographers to learn. Giving up the control of what takes place but controlling what the final image looks like by the way you see it and shoot it,” Adams says.
MYTH: ANYONE CAN BE A WEDDING PHOTOJOURNALIST
Just because some wedding photographers may try to emulate WPJA members' documentary approach, it does not make them wedding photojournalists who are qualified to document your wedding. “Photojournalism and shooting candids aren’t the same,” Adams stresses. “Wedding photojournalists don’t go into a situation and randomly photograph things around the room.” And neither do they follow the "machine-gun" approach, hoping that out of the myriad of shots a handful of decent pictures will emerge out of sheer mathematical probability.

Wedding photojournalism is applying professional skills and honed talent to tell the story of a wedding. WPJA Gold Medallion winner, Michael Albert understands how this myth might have been propagated. “Not to say they’re spreading rumors, but traditional photographers see wedding photojournalism as a fad that totally upends their paradigm,” he says. Or they’re seeing bad wedding photojournalism, letting a few mediocre photographers who call themselves “wedding photojournalists” speak for an entire industry. “I see a lot of people who say they’re photojournalists—and that doesn’t always translate to strong work,” he says.
REALITY: COMMUNICATE AND TRUST YOUR OWN EYES
When considering a wedding photojournalist, it's best to communicate and trust your own eyes, not rumors or heresay. Ask your WPJA photographer about his or her style. Ask to see samples. Look for a wedding photojournalist who is able to tell the story from start to finish, instead of presenting just one good photo from each wedding. “That means you have potential,” Albert states, “but it doesn’t necessarily mean you can tell the story of the day.” Fortunately, WPJA members have mastered the art of storytelling. And that’s no myth.
—by Meghan McEwen for the Wedding Photojournalist Association
Sunday, November 11, 2007
Emmeline & Jerry's Wedding
Emmeline and Jerry's big day, I was invited to captured the special moment for them.
Camera Nikon D40
Date July 2007
Camera Nikon D40
Date July 2007
Thursday, November 8, 2007
Chinese rituals

My brother's pre-wedding rituals. My mom looks happy and my yougest brother look on at the background.
Adelene & Alex's Wedding Day

Alex getting out of the car.

even the youngest of all was getting ready for the special day. Everyone turn their focus on her and forgot about the bride

Alfred was suppose to kiss the hand and not Jo Ann's cheek

Alex and Adelene.


It was an opportunity, and the strong lighting at the background created this interesting shot of gloom and bestman about to enter the bride's room. The photo had been through photoshop to retain the colour of the bouquet.

Photo was taken during Adelene & Alex's wedding dinner. Wonder who she is....
camera used: Olympus C750
Subscribe to:
Posts (Atom)



 Posts
Posts


